Monday, February 20, 2012

Sour Cream Chicken Enchilada’s

Years ago when we live in Las Vegas a friend on mine made these yummy chicken enchiladas.  I have a household full of picky eaters so this worked out great, it is now a regular staple in our house.

Ingredients:

10-12 flour tortillas

medium container of sour cream

can of cream of chicken soup

1 c. grated cheese (whatever you want, I use Colby jack)

1/2 c. of cheese for topping

1 small can of green chilis ( my family won’t touch them if they are in it)

Shredded chicken (I buy chicken roast on sale at walmart after 7pm and then shredd them)


IMG_0041IMG_0044

Mix all the ingredients

IMG_0063

After mixed take a spoonful and put on tortilla

IMG_0064

Spray the pan before putting in tortillas

IMG_0071IMG_0073

Top with leftover mix and cheese.

Spray the bottom of the tinfoil so it doesn’t stick.  Put tinfoil on and then put in oven at 350* for 40 minutes, then remove foil and cook another 10-15 minutes until golden brown.

IMG_0074

Bring out the salsa and ENJOY…..

Easy Monkey Bread

So today with no school it called for making Monkey Bread, one of my kids favorite breakfasts.  Remember this IS NOT low in fat.

Making this is real easy.

Ingredients:

2 cans of jumbo biscuits or 4 cans of small biscuits

sugar/cinnamon mix (2 cups sugar and about 5 tablespoon of Cinnamon in a ziploc bag)

1 cube of butter (1/2 c.)

1-1 1/4 c. of brown sugar

1 deep glass dish or bundt pan

Preheat oven to 325*

101_0605

I didn’t have any cubes of butter so I used my huge tub of butter.

First:

Open biscuits and if using jumbo cut into fourths or small cut into half.

101_0606

Next: After mixing your cinnamon and sugar mix in a bag (because you won’t use it all and use it for next time) put the pieces of dough in bag.  Only put a few in at a time to make sure they are coated very well with the mixture.

101_0617

101_0607

Take the pieces and put it in a glass baking dish, pile them on top of each other.

101_0608101_0610

Next step:

Melt butter in microwave then add brown sugar

101_0611101_0612

TIP:  I keep my brown sugar fresh and soft at all times by putting a piece of bread with the sugar.  I just keep it in there and replace it every FEW months.


101_0615

To finish this yummy treat…pour the sugar butter mix on the biscuits.

101_0614101_0616

Put in oven for 30-45 minutes (depends on how fast your oven cooks things)

Make sure all the dough is cooked and then take out of oven.  (if not done in the center take out and then microwave the few few pieces that didn’t cook so you don’t burn the rest of the biscuits)

101_0620

The last step is the best and most important.  Get a cookie sheet and either put it on top or on the counter and then dump the biscuits upside down on the tray, all the yummy gooey sugar pours on top of it.

101_0621101_0622


Dig in and enjoy.

Saturday, February 4, 2012

Heart Shaped cupcakes

When I was a teenager my mom taught me to make heart shaped cupcakes.  The trick was using marbles.  Yes, the ones you played with as a kid.  So I told my teenager I would teach her the trick.  So we headed to walmart and found the marbles, nice and cheap $1.  We bought strawberry cake mix because I am not so homemakey on making homemade cakes (is homemakey a word???) And of course bought the pretty pink frosting with the cute sprinkles.  First step is making the mix.  Put the cupcake wrappers in the cupcake pan, fill them with batter and then put the marble on the outside of the wrapper and shape them into hearts.

IMG_0047IMG_0048IMG_0049IMG_0050


Bake them according to the directions.  Remove from oven and TaDa…there is your heart shaped cupcake.

IMG_0051IMG_0052IMG_0057IMG_0062

Have fun and enjoy the yumminess….

Saturday, January 28, 2012

January Reward for Scripture reading...

Here is the reward for January's scripture reading.  I bought some ariheads and some big smarties and put them in a bag and attatched the note.
january reward


I plan on giving the kids who return their calendar a treat and those that want can return them next week.  If they haven't read they can either finish January and still recieve the treat or start fresh with Feb. and get the treat at the end of the month.

Wednesday, January 25, 2012

Valentines Gifts

I am so excited with my valentine gifts for the kids.  I am even more excited that I have them done before February.  When I had lots of spare time and a lot more energy I use to write my kids letters every year to tell them how proud I was of them and their accomplishments.  So this year while looking around for ideas I kept seeing different types of “subway art” representing Valentines day.  So I decided to create my own “Love Art” as I refer to it as.  I used Picnik.com (Hurry now because their Premium package is free  until April 19th because they will be closing down Sad smile)  So I adventured into it because I don’t have the amazing skills to use Photoshop Elements and Picnik is AMAZING. 
I created each child a page and then I will post it in a frame.  Each page tells them their age, their talents, their physical features I adore and just that I love them.  A Note: Set the measurements 2400 x 3000 to get a perfect page for an 8 X 10 frame.
bryan valcarson valentineak valcasey val
I hope they enjoy these, now I need to make one for my sweetie, not sure if I will show that one Smile

I finished my lovely husbands...I love it

Wednesday, January 11, 2012

Homemade pretzels

  Week 2 

So making pretzels seems like an impossible task.  I have never made pretzels because I thought it was way to complicated.  Now I think we will making them often, they were easier then expected and way yummier then those store bought ones.  I learned from a couple of mistakes.  I saw this recipe in Woman’s Day magazine and it looked easy.

Soft Pretzels
1  1/4 oz active dry yeast ( 2 1/4 tsp)
1 Tbsp sugar
1/4 tsp salt
4 1/2 to 4 3/4 c. flour
2 tbsp canola oil
2 tbsp baking soda

1.  In a large bowl, combine the yeast, sugar, salt, and 2 c. of flour.  Warm 1 1/2 c. of water, add the water and 1 tsp oil to the flour mix.  Using and electric  mixer, beat until smooth, about 2 mins.
2. Reduce the mixer speed to low and gradually add 2 c. of flour( 1/3 c. at a time), mixing until the dough begins to pull away from the side of the bowl.  Turn dough out onto floured surface.  Knead in 1/2 c. of the remaining flour until dough is smooth (add more if still sticky), about 5 minutes.
3.  Coat a large bowl with the remaining tbsp. of oil. Place the dough into the bowl, then turn it so it is oiled-side up.  Cover with a clean towel and let rest in a warm place until it doubles in size.  About 45 mins.
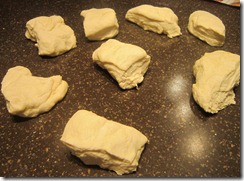
4. Line 2 baking sheets with parchment paper (we didn’t have paper so we used tinfoil, make sure you spray with oil before putting in oven. Preheat oven to 400* .  Punch down the dough and cut into 8 pieces (they were really big, you could even cut them into 16 pieces for smaller sizes)
IMG_0097IMG_0098
In the meantime put some water in a saucepan ( I used my wok because it was the perfect size), add 2 tbs of Baking soda to the water and get it to a simmering point.
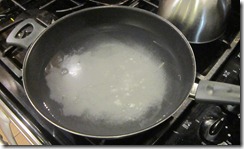
IMG_0099
with lightly floured hands (don’t put flour on counter because you need the friction)  Roll each piece in 1/2 “ rope.
IMG_0105
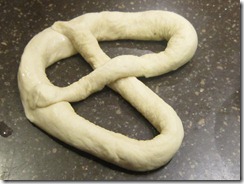
then take each strip and make a U shape then take ends twist and fold over  to make the pretzel shape.  Use water to secure the ends to the dough.
IMG_0100IMG_0104
Next gather all the topping you wish to use on the pretzels for example: parmesan cheese, salt, cinnamon and sugar, any other toppings plus melted butter.
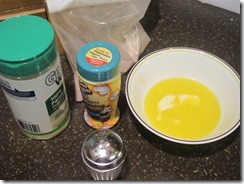
IMG_0102
Once your water is simmering put in a pretzel and turn it after 30 secs and after 30 secs take out and put on tray.
IMG_0101IMG_0107IMG_0106
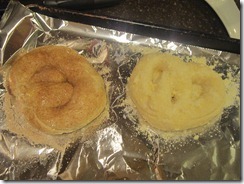
After taking out of water add toppings…
IMG_0103
Then put in oven for 8 minutes, take them out and turn the tray around for another 8 minutes.  Take out of oven
IMG_0108
And enjoy……
IMG_0111
I hope your Pretzels turn out as yummy as our did.

Friday, January 6, 2012

Book of Mormon Reading Chart for 2012

So this year in Primary we will be studying the Book of Mormon. I wanted to find a fun and easy challenge for my class of 9 years old. I have a mix of kids so I wanted something easy for them to follow but also not so overwhelming. I have decided the reading into the 12 months. I will give them a month at a time, at the end of each month they will return the calendar showing they read all of the months reading and then they will get a prize. Not a piece of candy prize but a prize that has some spiritual and thoughtfulness in it. Not sure yet what each month will bring regarding that. I made a bookmark to start them off with that has the dates for them to remember to turn in their calendar's. Here is the calendar for Jan and Feb.
image     image
I finally figured out how to make it so you can download this.  Go to the bottom of this post and click on BOM chart.
Here is the book marks for the reading guidelines.  I used the LDS scrapbooking Blog Train, love it.  This month’s theme was CTR
There are 4 bookmarks on each page with a combination of boy and girl.

image     image
I hope the kids love this idea, I do.  I am planning on following the plan, but I may read more then listed. 

Have fun and enjoy...
Download Book marks
Also I have completed the whole year for calenders...you can download them Here or click on the pictures.